

Setting Up Quantum ePay Hosted Checkout for Shopify
Share article
- Quantum ePay is the checkout experience connected to your Shopify store.
- Qoin is the payment gateway that securely processes the payment in real time.
On This Page
- Opening Quantum ePay in Shopify
- Roles and Responsibilities
- Merchant Onboarding and Installation Process
- Shopify App Navigation
- Test and Live Modes
- Theme Installation and Button Placement
- How Standard Storefront Checkout Works
- Draft Order Invoices
- Refunds and Voids
- Checkout Customization
- Test and Demo Checklist
- Go-Live Checklist
- Common Issues and Troubleshooting
- Need Help?
- Appendix A - Demo Walkthrough
Opening Quantum ePay in Shopify
Roles and Responsibilities
| Role | Primary Responsibility | Provides / Performs |
|---|---|---|
| Merchant / Client | Provides access and approves go-live |
|
| Quantum Implementation Owner | Owns implementation and store setup |
|
| Quantum Development Team | Generates merchant-specific Live Qoin API credentials and supports technical escalation | Merchant-specific Live Qoin Client ID and Client Secret. |
| Quantum Support / Qoin Gateway | Supports gateway provisioning | Live X-Terminal Key generated in the Qoin gateway (by Support or Merchant, depending on process). |
Merchant Onboarding and Installation Process
1. Receive the Shopify Collaborator Code
- App installation
- Theme updates
- Draft Orders and Orders
- Testing
2. Obtain Collaborator Access
3. Request Live Qoin Gateway Credentials
4. Install the Quantum Checkout app for Shopify
5. Configure Merchant Settings
6. Configure Checkout Appearance
7. Install Storefront Buttons
8. Test the Checkout
- Storefront test order
- Draft Order invoice test
- Refund or void test
9. Activate Live Payments
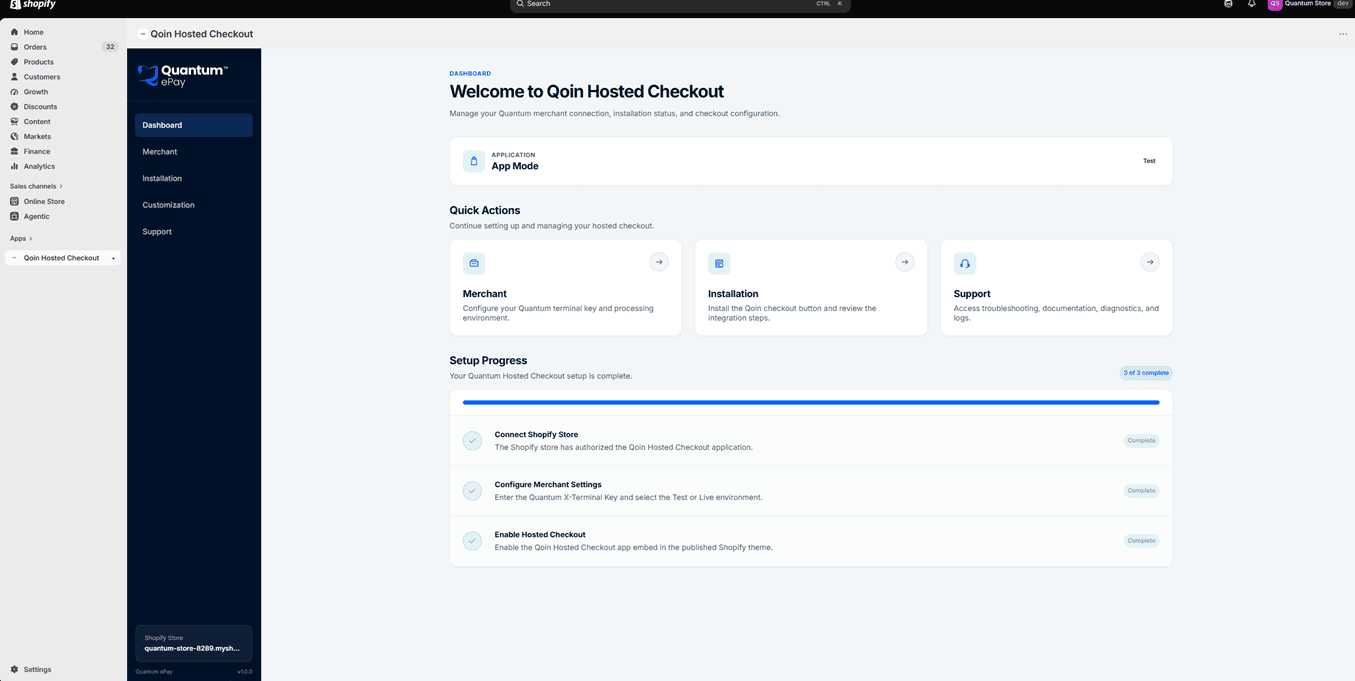
Shopify App Navigation
Dashboard
View the store’s connection and setup status, along with available quick actions.
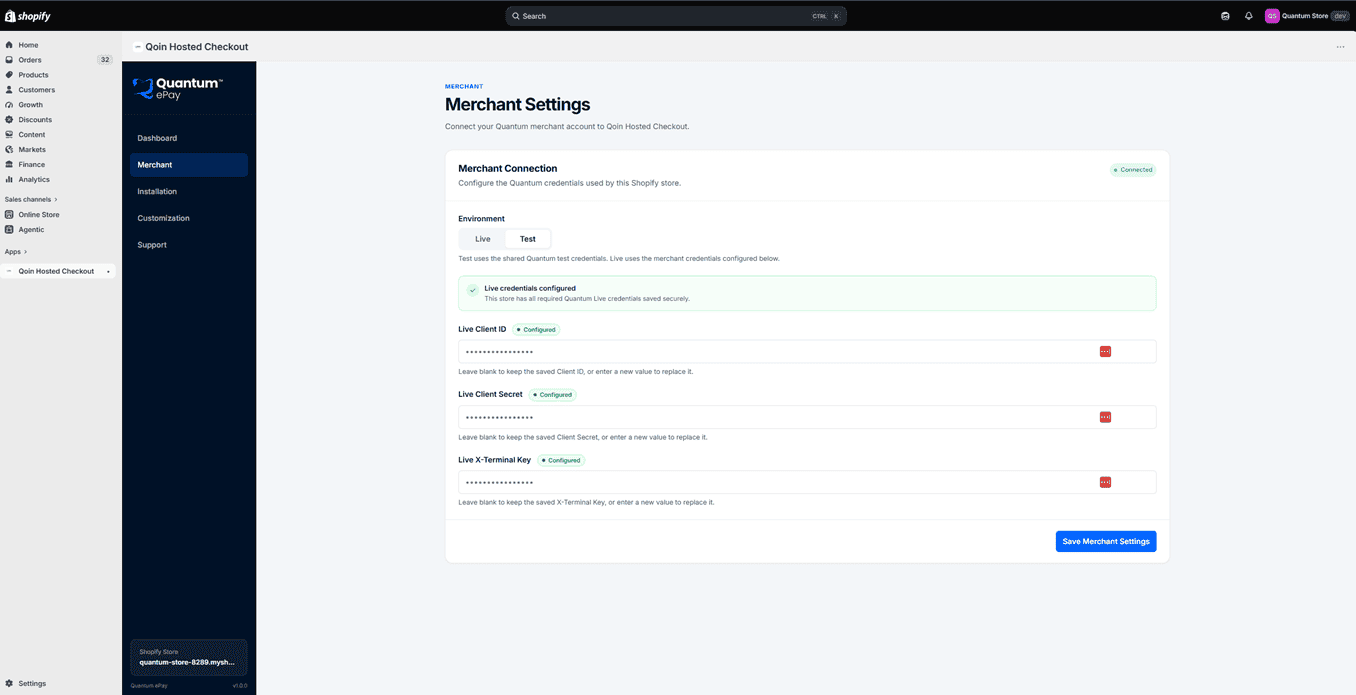
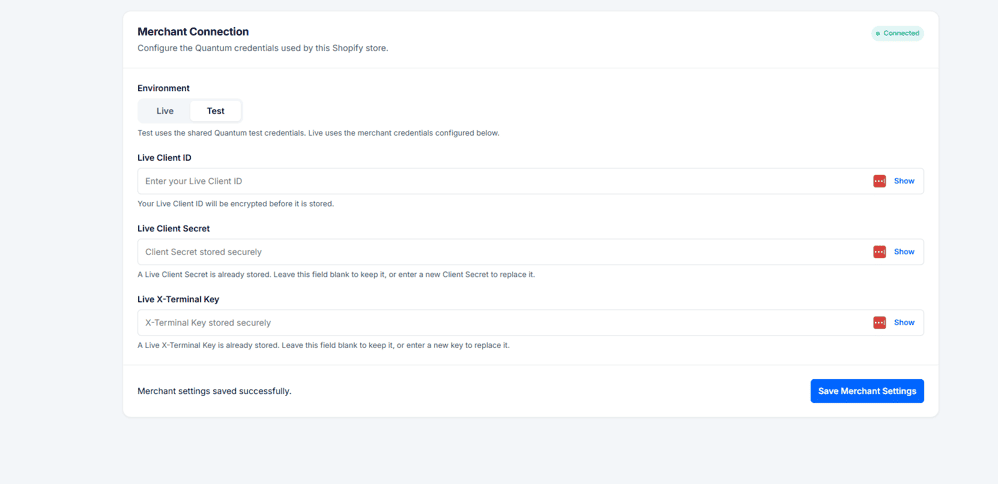
Merchant
Manage Test and Live mode and enter the merchant/client’s Live Qoin credentials.
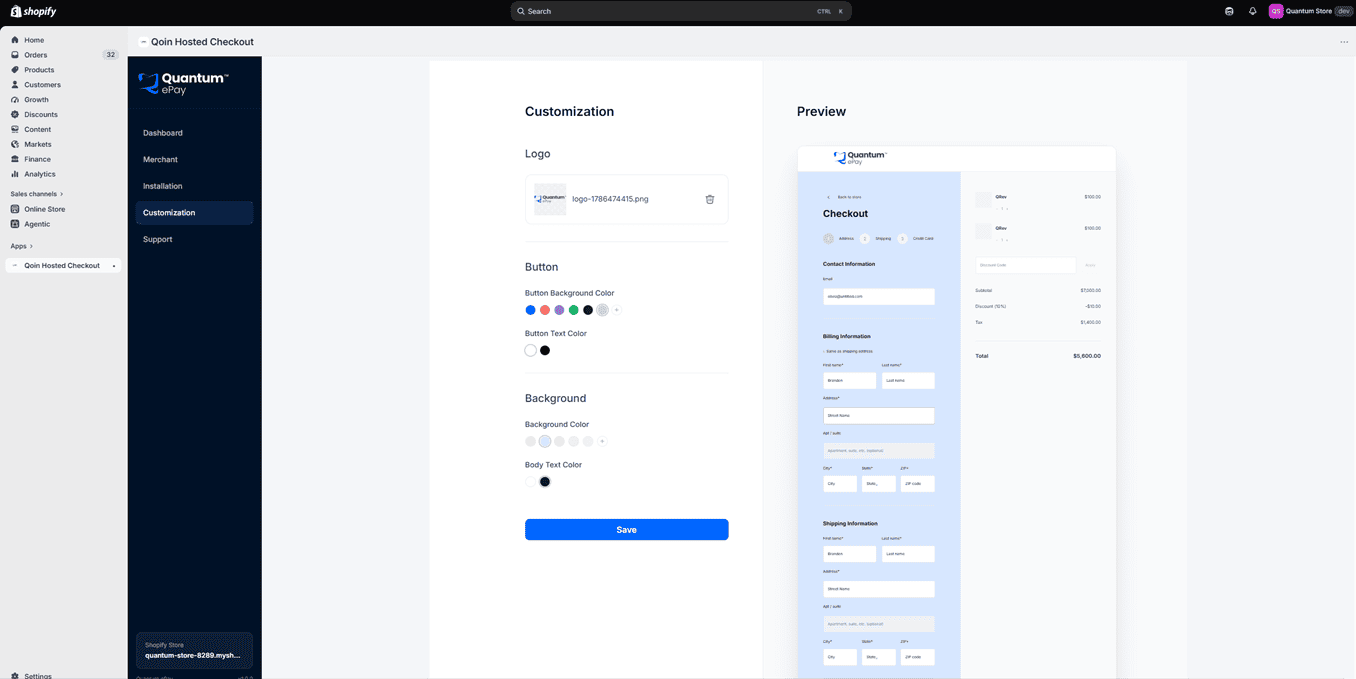
Customization
Update the checkout branding, including the logo and available color settings.
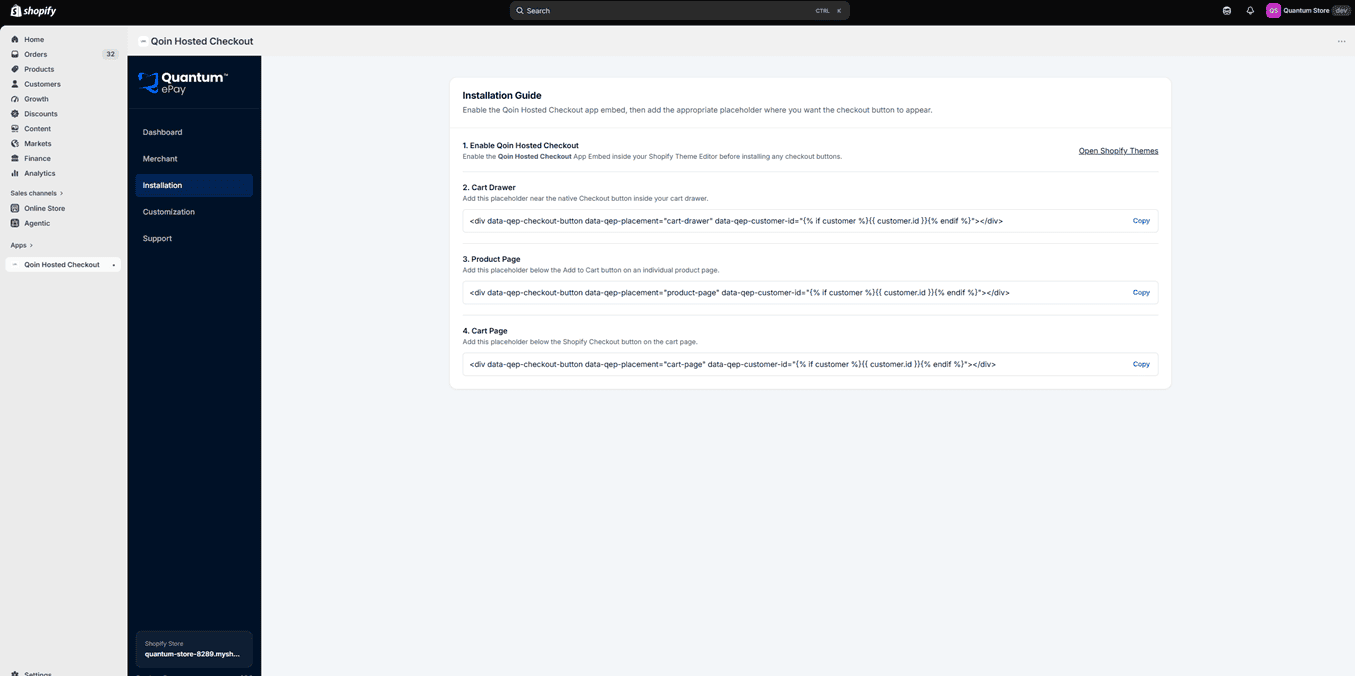
Installation
Access the instructions needed to enable the checkout and add Quantum checkout buttons to the storefront.
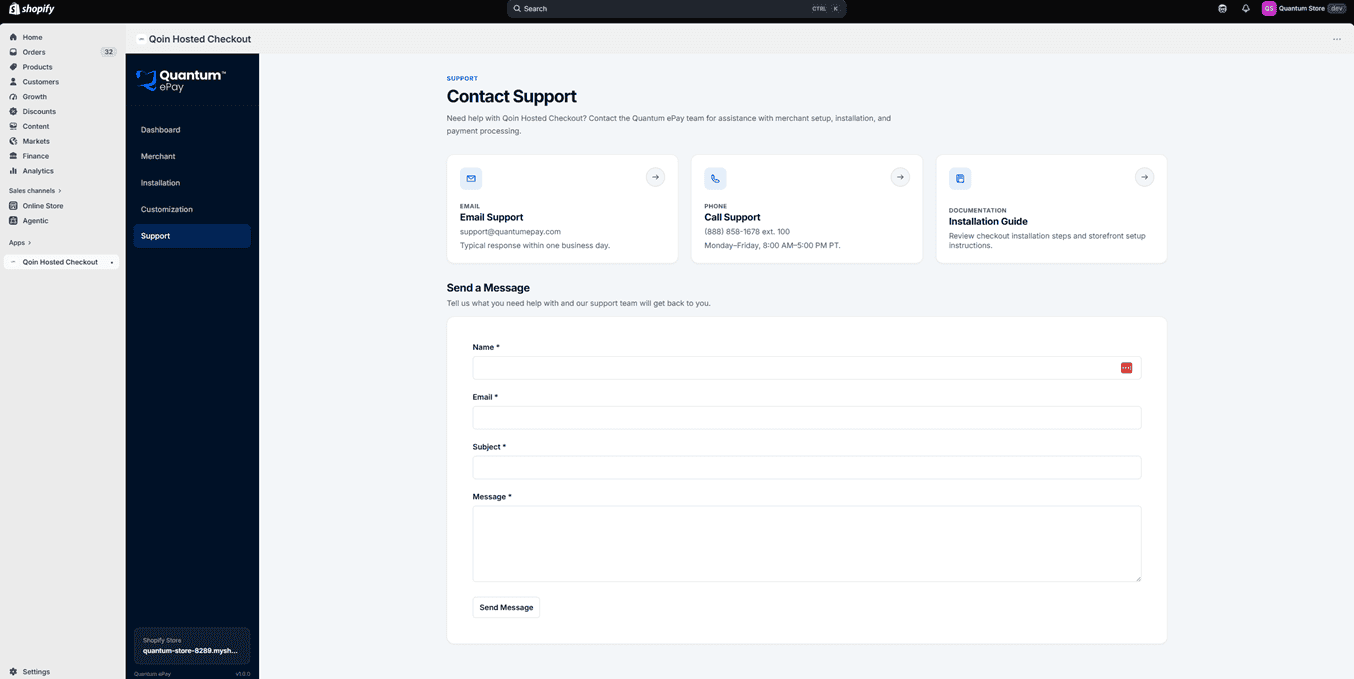
Support
View Quantum Support contact information or submit a support request through the app.
Test and Live Modes
How Credentials Work in Each Mode
TEST
- Uses shared Qoin Test credentials
- No merchant-specific Test credentials are required
- No live payments are processed
LIVE
- Uses credentials unique to each merchant/client
- Includes the Qoin Client ID, Client Secret, and X-Terminal Key
- Credentials are encrypted and securely stored for the merchant/client’s store
Merchant Settings
Theme Installation and Button Placement
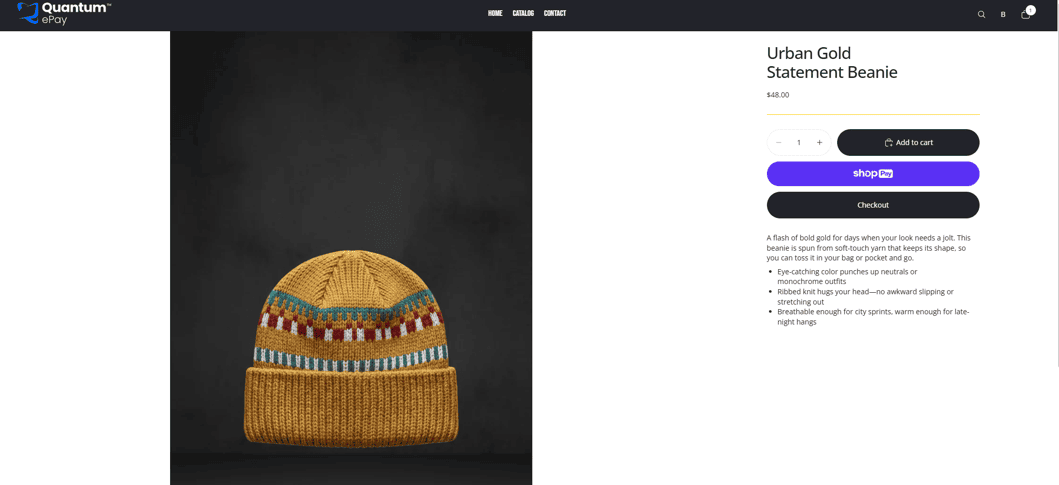
In the Shopify Theme Editor, enable the Quantum Checkout for Shopify. Then add the matching code below to each location where the Quantum checkout button should appear.
| Placement | Placeholder |
|---|---|
| Cart Drawer | <div data-qep-checkout-button data-qep-placement="cart-drawer" data-qep-customer-id="{% if customer %}{{ customer.id }}{% endif %}"></div> |
| Product Page | <div data-qep-checkout-button data-qep-placement="product-page" data-qep-customer-id="{% if customer %}{{ customer.id }}{% endif %}"></div> |
| Cart Page | <div data-qep-checkout-button data-qep-placement="cart-page" data-qep-customer-id="{% if customer %}{{ customer.id }}{% endif %}"></div> |
How the Checkout Button Works
Storefront Placement Examples

How Standard Storefront Checkout Works
Customer Checkout Experience
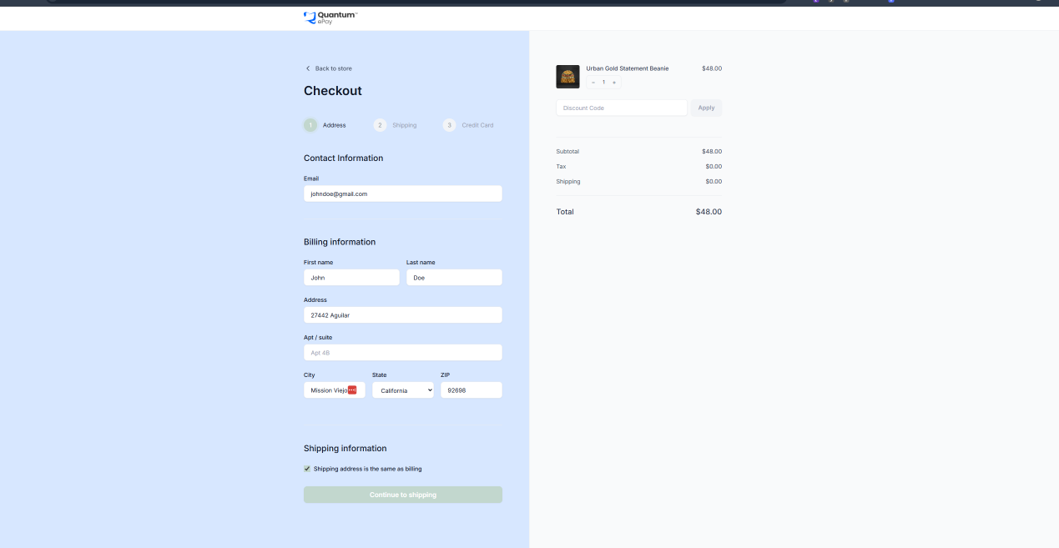
Logged-In and Guest Checkout
Payment Retry Protection
Draft Order Invoices
Send a Draft Order Invoice
- Create and save the Draft Order in Shopify Admin.
- Select Send Invoice through Quantum.
- Review or update the recipient email, subject, and message.
- Send the invoice.
Draft Order References
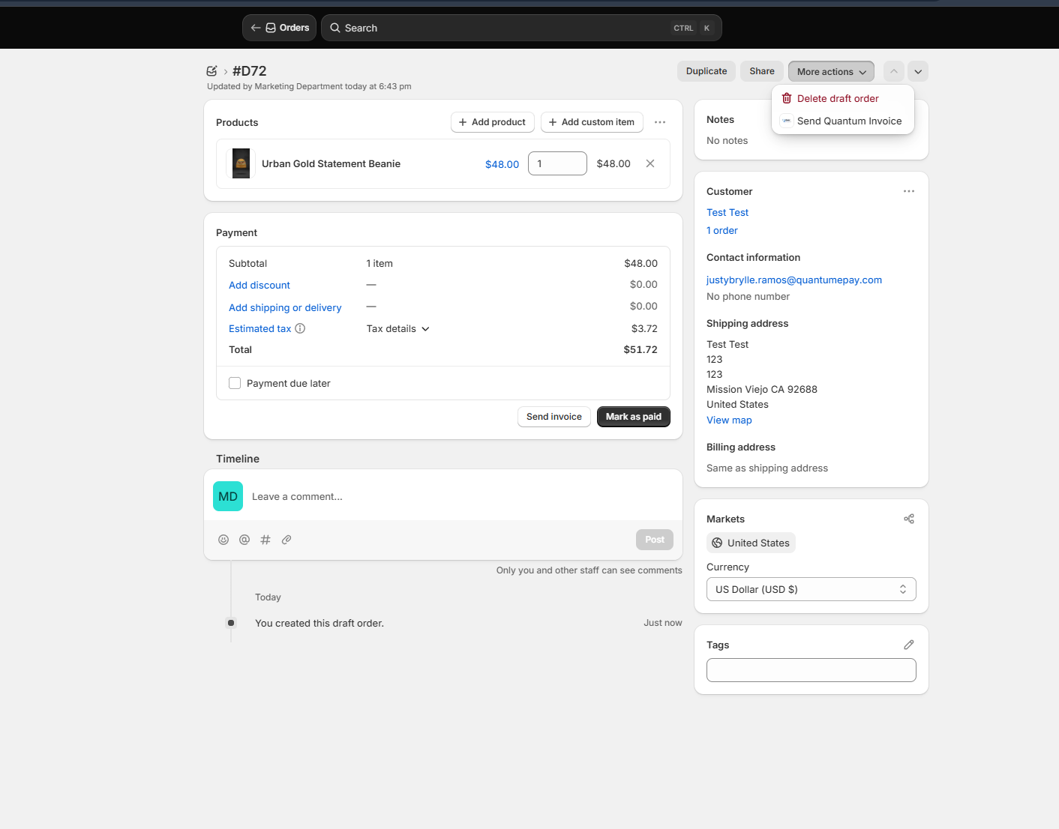

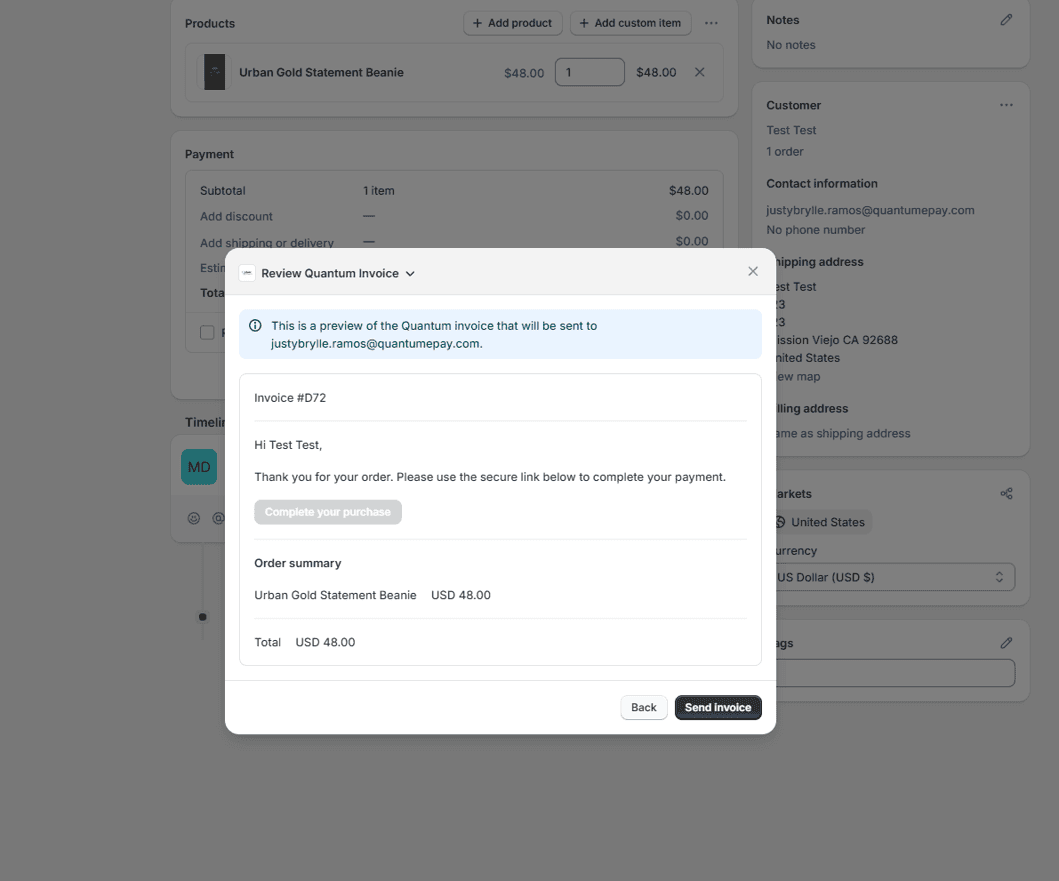
If a Draft Order Changes
One Link, One Checkout:
Each Invoice Link Uses the Same Checkout
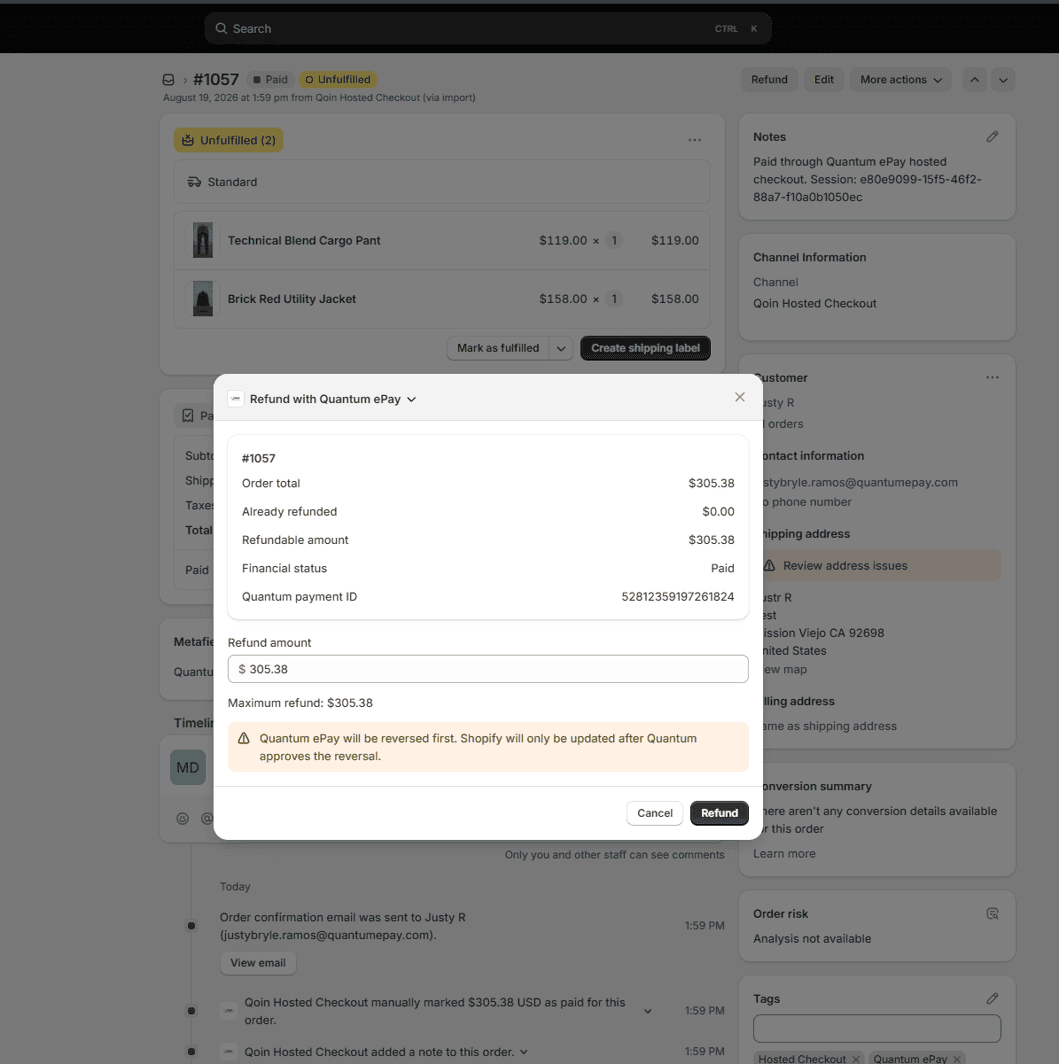
Refunds and Voids
- Pending settlement: Void / reversal
- Settled: Refund
Refund and Void References
Use the Quantum refund/void action from an eligible Shopify order to begin the process.
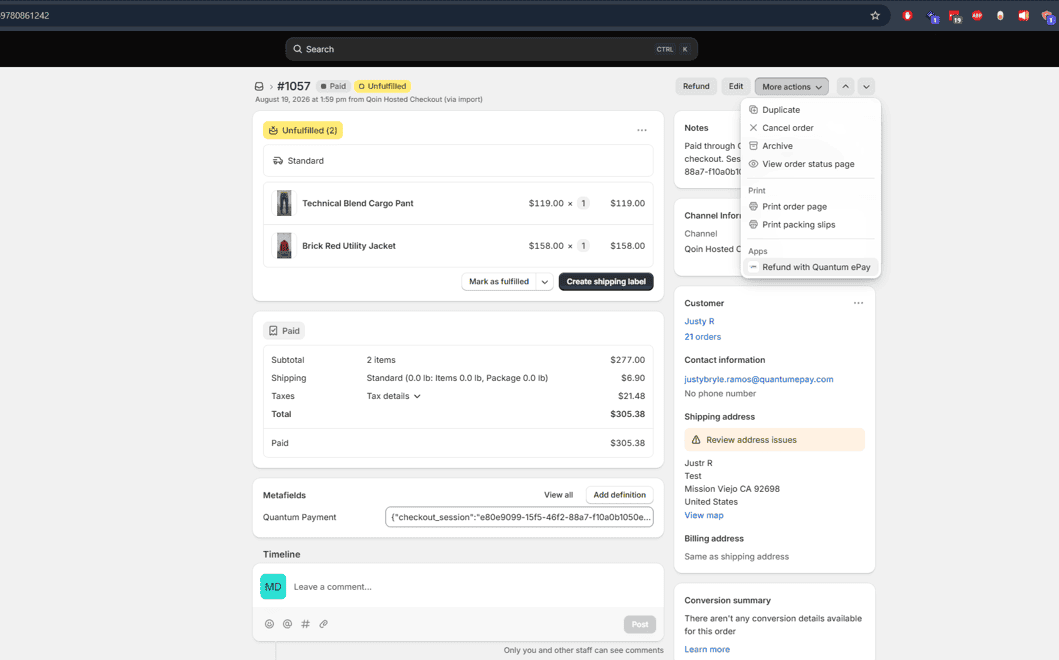
| Qoin Payment Status | Action |
|---|---|
| Pending settlement | Void / Reversal |
| Settled | Refund |
Checkout Customization
Checkout customization is specific to each merchant/client’s Shopify store. Use the Customization section to update the logo and available color settings, then review the checkout before launch to confirm the branding displays correctly.
Test and Demo Checklist
- Open Quantum Checkout through Shopify Admin and confirm the Dashboard, Merchant, Customization, Installation, and Support tabs load correctly.
- Confirm the store is in Test mode.
- If Live credentials have already been added, confirm the Qoin Client ID, Client Secret, and X-Terminal Key show as configured. Do not expose saved credential values.
- Confirm the Quantum Checkout App Embed is enabled in the active Shopify theme.
- Confirm the Quantum checkout button appears in each intended location and continues to display after cart quantity updates.
- Complete a test payment as a logged-in customer. Confirm the transaction appears in Qoin and the Shopify Order is created.
- Complete a test payment as a guest customer. Confirm the transaction appears in Qoin and the Shopify Order is created.
- Create a Shopify Draft Order, send the Quantum invoice, complete payment, and confirm the same Draft Order is completed as a Shopify Order.
- Update an item or quantity on a Draft Order, resend the Quantum invoice, and confirm the checkout reflects the updated order details.
- Open the same invoice link more than once and confirm it returns to the same checkout session
- Complete a refund or void test and confirm the request is processed successfully in Qoin and reflected correctly in Shopify.
- Confirm that opening the app directly outside of Shopify Admin displays the Shopify Admin access message rather than an error page.
Go-Live Checklist
- The merchant/client has approved the checkout appearance and workflow.
- Quantum Development has provided the correct merchant-specific Live Qoin Client ID and Client Secret.
- The correct Live Qoin X-Terminal Key is configured for the merchant/client.
- All Live Qoin credentials are saved in Merchant Settings and show as configured.
- All required Test mode workflows have been completed successfully.
- Internal check: Production debugging is disabled and HTTPS is enabled.
- The required Quantum checkout button code is added to the active Shopify theme and the Quantum Checkout App Embed is enabled.
- The store is switched from Test mode to Live mode only after final approval.
- Support contacts and the appropriate escalation process are confirmed before launch.
Common Issues and Troubleshooting
Checkout Button Missing After a Cart Update
Payment Approved, but the Shopify Order Is Not Showing
Draft Order Invoice Shows an Old Quantity
Live Mode Cannot Connect to Qoin
- Client ID
- Client Secret
- X-Terminal Key
Shopify Admin Access Message Appears
Refund or Void Is Rejected
Need Help?
The Support tab in the Quantum ePay Shopify app includes current support contact information and an in-app form for submitting support requests.
| Channel | Details |
|---|---|
| support@quantumepay.com | |
| Phone | (888) 858-1678 ext. 100 |
| Hours | Monday-Friday, 8:00 AM-5:00 PM PT |
| Development escalation | Use an internal development ticket for merchant-specific Live Qoin Client ID/Client Secret generation and application-level issues. |