


Setting Up Qoin WooCommerce Plugin
Share article
Use this guide to install the Quantum ePay for WooCommerce plugin, connect the merchant/client’s store, configure payment settings, and verify that payments are working correctly.
Install the Quantum ePay Plugin
1. Download the Plugin
Download the Quantum ePay plugin ZIP file from the download link provided by your Quantum ePay representative.
2. Open WordPress Plugins
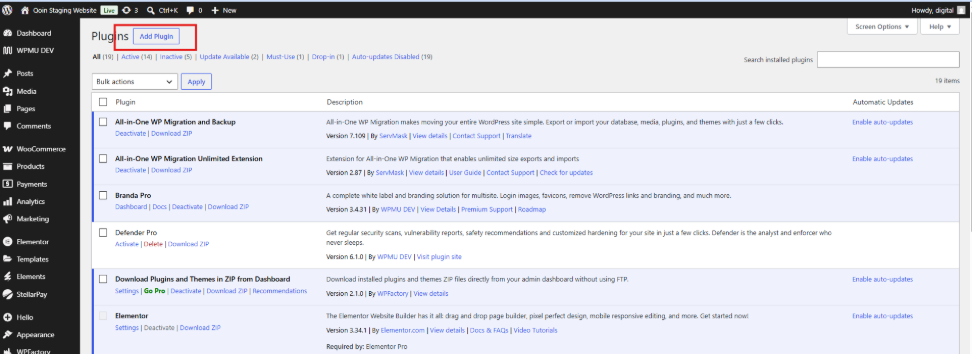
Log in to your WordPress Admin Dashboard and go to:
Plugins > Add Plugin.
3. Upload the Plugin
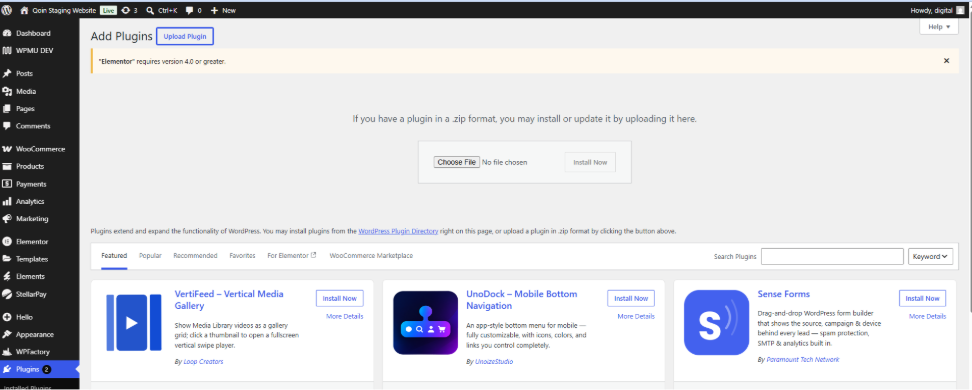
Select Upload Plugin, then select Choose File and upload the Quantum ePay ZIP file.
4. Install and Activate
Select Install Now.
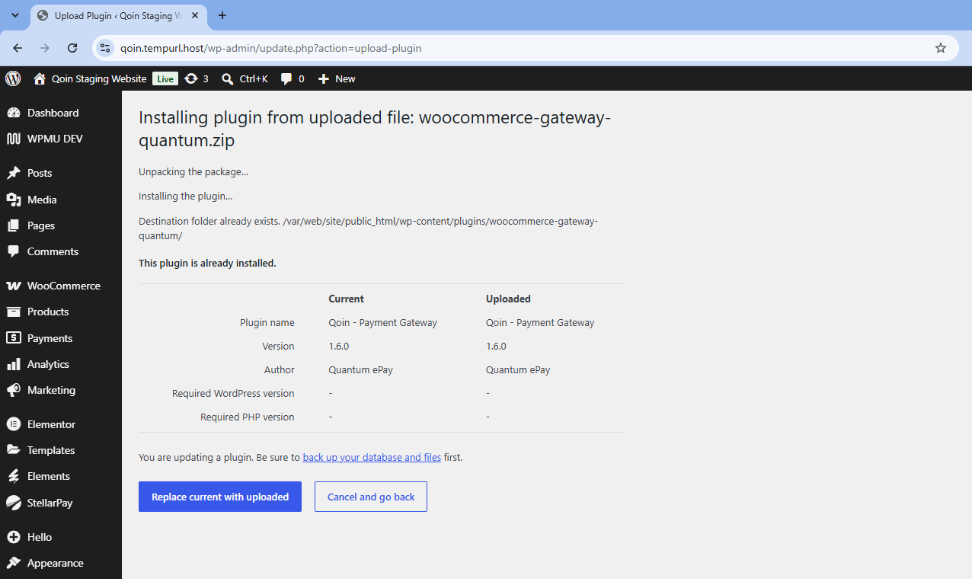
If this is a new installation, select Activate Plugin once the installation is complete.
If WordPress detects an existing version of the plugin, select Replace current with uploaded.
Open the Quantum ePay Payment Settings
5. Open WooCommerce Payment Settings
From your WordPress Admin Dashboard, go to:
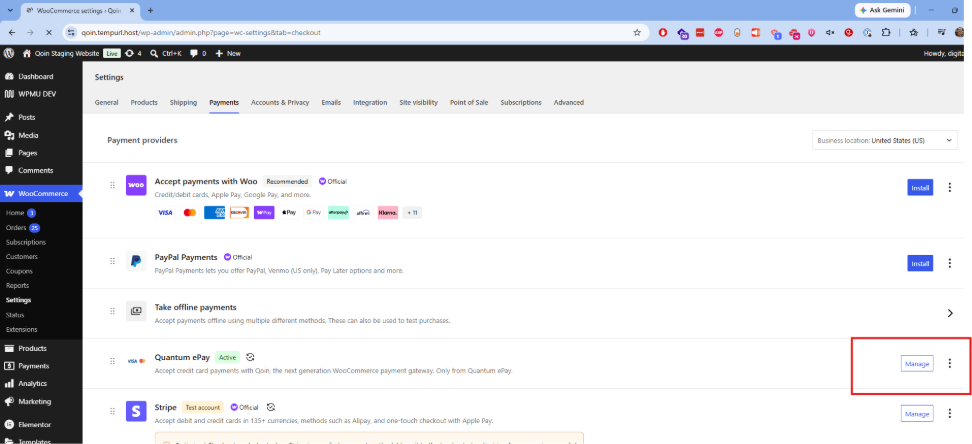
WooCommerce > Settings > Payments
6. Find Quantum ePay
Locate Quantum ePay in the list of payment methods. Confirm that it is enabled, then select Manage.
Configure Gateway Setup
The Quantum ePay settings are organized into Gateway Setup, Checkout Settings, and Support & Help.
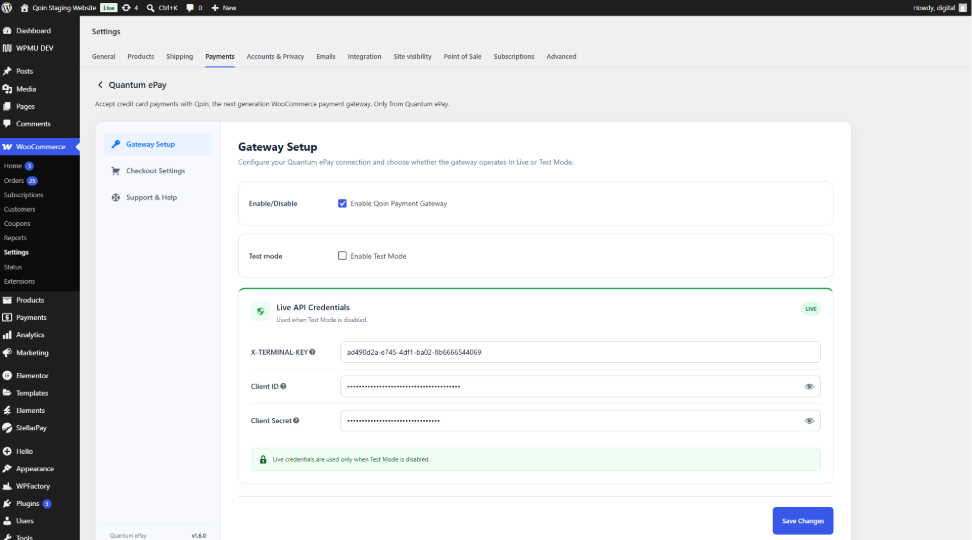
7. Enable Quantum ePay
Under Gateway Setup, confirm that Enable Qoin Payment Gateway is checked.
8. Select Test or Live Mode
Enable Test Mode only when testing the payment setup.
If you're ready to process live payments, make sure Enable Test Mode is unchecked.
Congratulations! Your WooCommerce store is now ready to accept payments with Quantum ePay.
Need Help?
Email Support: deployment@quantumepay.com
Phone Support: (888) 858-1678 ext. 100